This post contains affiliate links. Please see our disclosure policy.

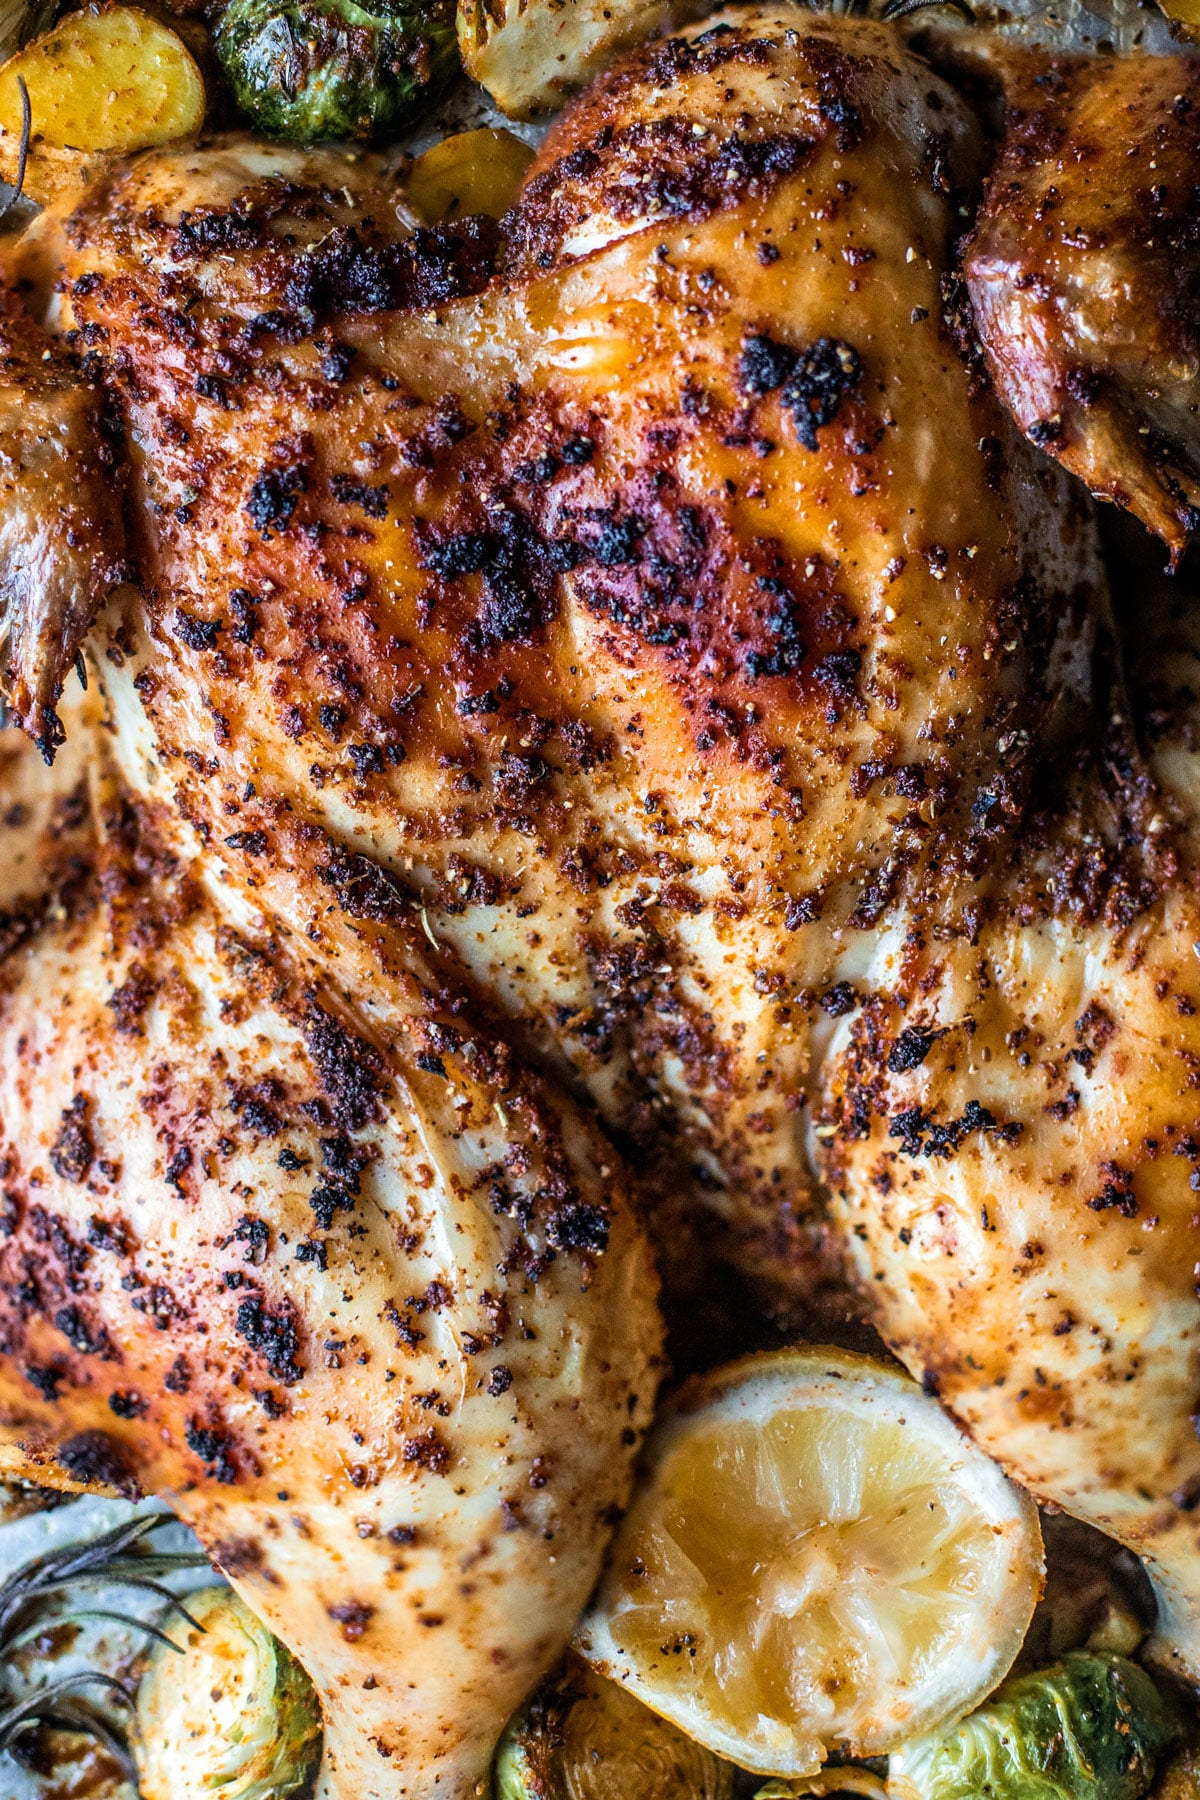
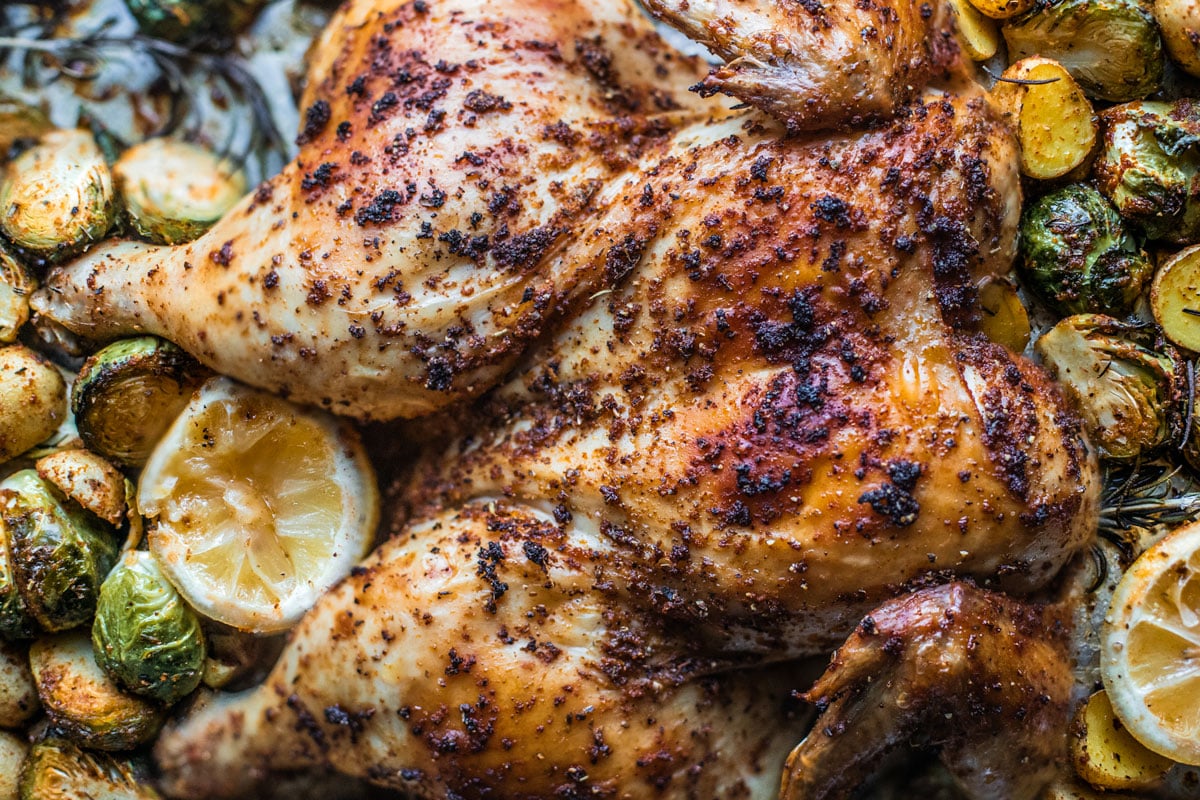
Love one-pan dinners? This roasted spatchcocked chicken in the oven is as good as it gets, and it’s so easy to make. The whole chicken is rubbed with a bright, savory lemon-and-herb rub, then roasted alongside perfectly seasoned potatoes and veggies.
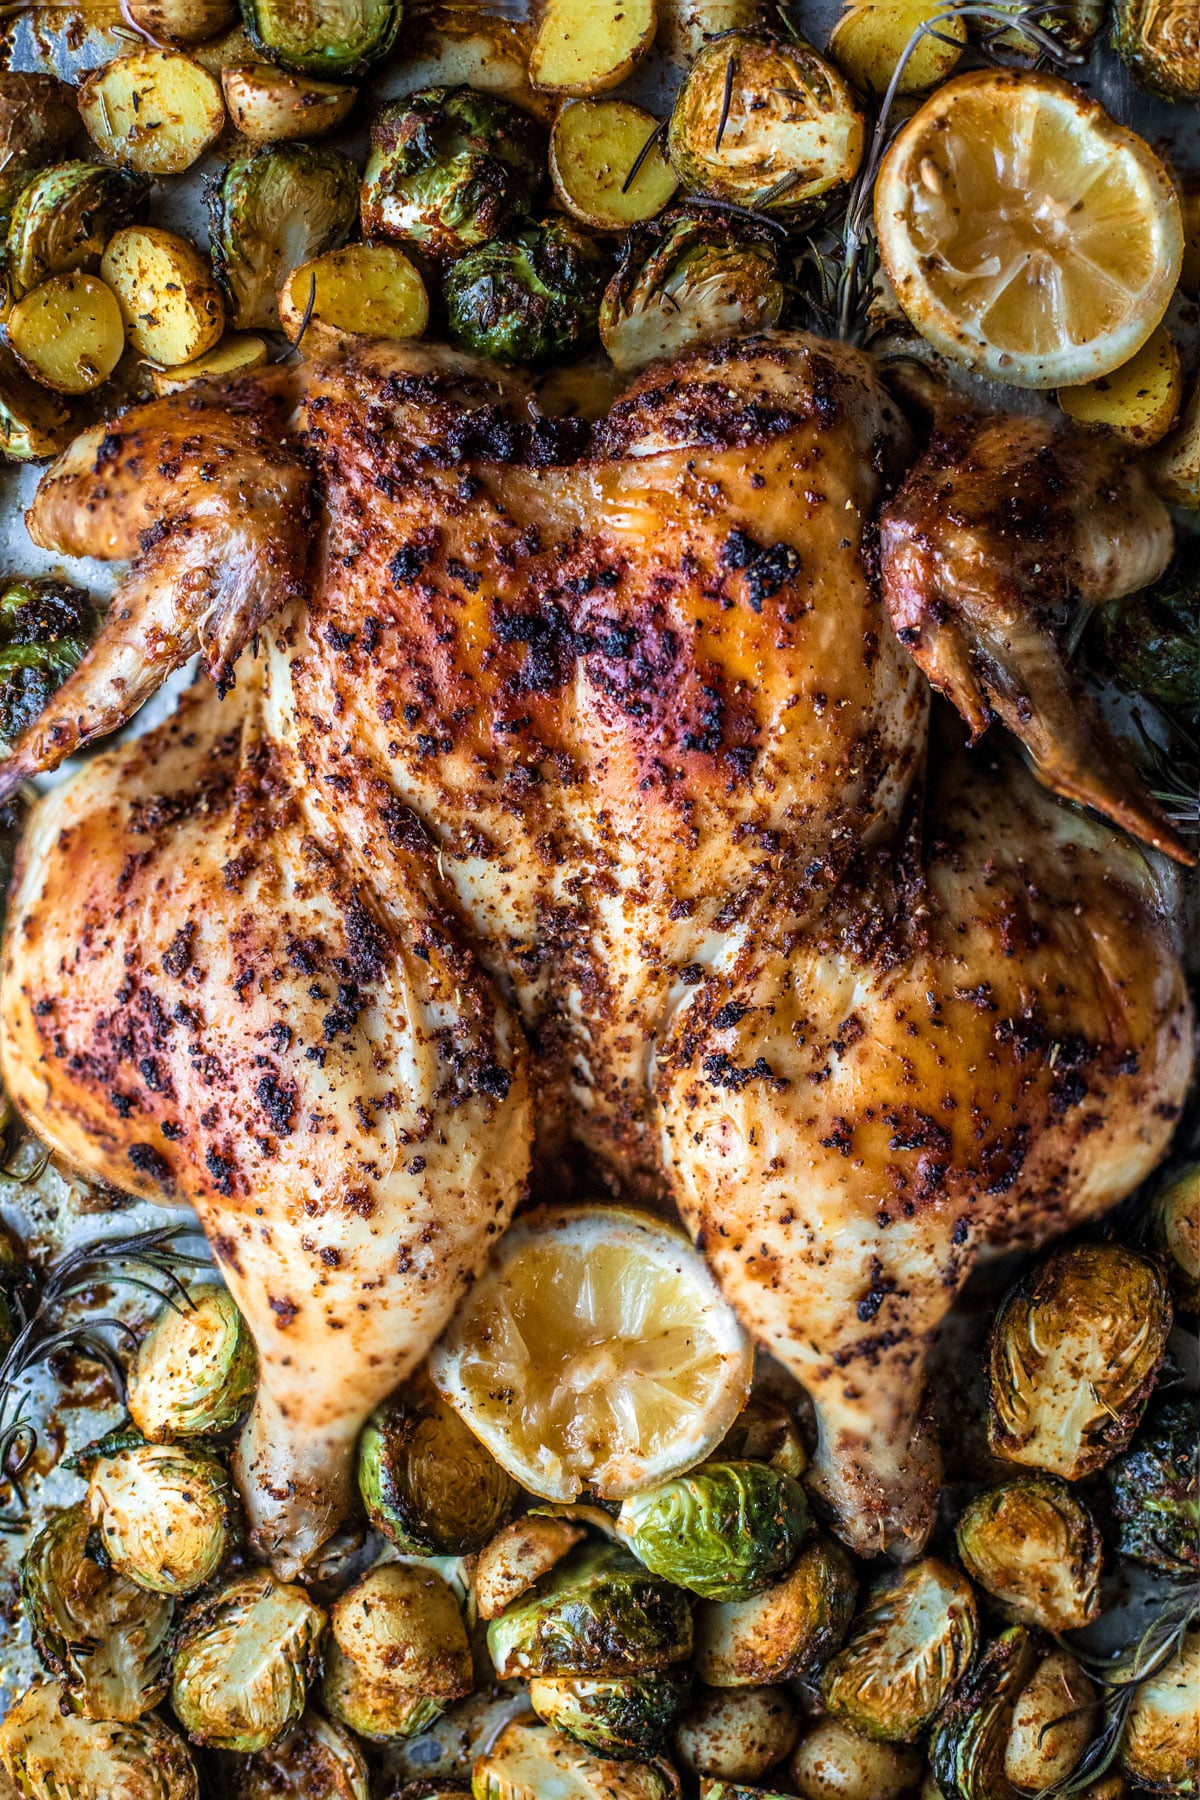
This roasted spatchcocked chicken recipe is a culinary flex, and yet it couldn’t be easier to prepare. Try it once, and you’ll have the confidence to spatchcock chicken on the regular, giving family or guests the juiciest, tastiest, crispiest golden chicken they’ve ever had. This recipe also includes seasoned baby potatoes and Brussels sprouts for a complete, nourishing meal.
While you’re on the sheet-pan chicken dinner bandwagon, try this sheet-pan chicken fajita bowl or this delicious Greek sheet-pan chicken with feta.
Table of Contents
- How to Spatchcock Chicken (Video)
- Why This Recipe Works
- Ingredient Overview
- Useful Tools
- How to Spatchcock Chicken
- How to Cook Spatchcocked Chicken
- Substitutions & Variations
- Storage & Reheating
- What to Serve With Spatchcocked Chicken
- Frequently Asked Questions
- Easy Roasted Spatchcocked Chicken (With Video) Recipe
- More Easy Chicken Dinners
How to Spatchcock Chicken (Video)
Why This Recipe Works
- A spatchcocked chicken’s breast sits flat in the pan alongside the legs, allowing all parts to cook evenly, giving you a juicy, flavorful chicken every time.
- The baby potatoes and Brussels sprouts require the same amount of roasting time.
- Because of the high heat, the vegetables caramelize, turning crisp on the outside while remaining tender within.
Ingredient Overview
A quick look at the essentials before we dive into how to make this recipe:
- Whole chicken: This recipe uses a 5 lb chicken. If you go larger, make sure to adjust the cook time accordingly and check the internal temperature—you want to be around 160-165ºF.
- Seasoning: I use my homemade Italian seasoning in the rub, but if you have your own favorite blend, feel free to use it.
- Lemons: The heat caramelizes them, bringing out a sweeter, more pronounced flavor. It also loosens the juices up so you get a much better squeeze.
- Aromatics: If you have fresh herbs kicking around (thyme, rosemary, or oregano) and a few spare garlic cloves, nestle them into the pan with everything else for an incredible smell throughout the house.
Useful Tools
- Kitchen shears—to properly cut through the chicken.
- Meat thermometer—to ensure your chicken reaches the appropriate internal temperature.
How to Spatchcock Chicken
Spatchcocking might sound technical, but it’s really just a simple way to remove the backbone so the chicken can lie flat, cook more evenly, and brown better.
You can watch the step-by-step video above or follow along with these instructions.
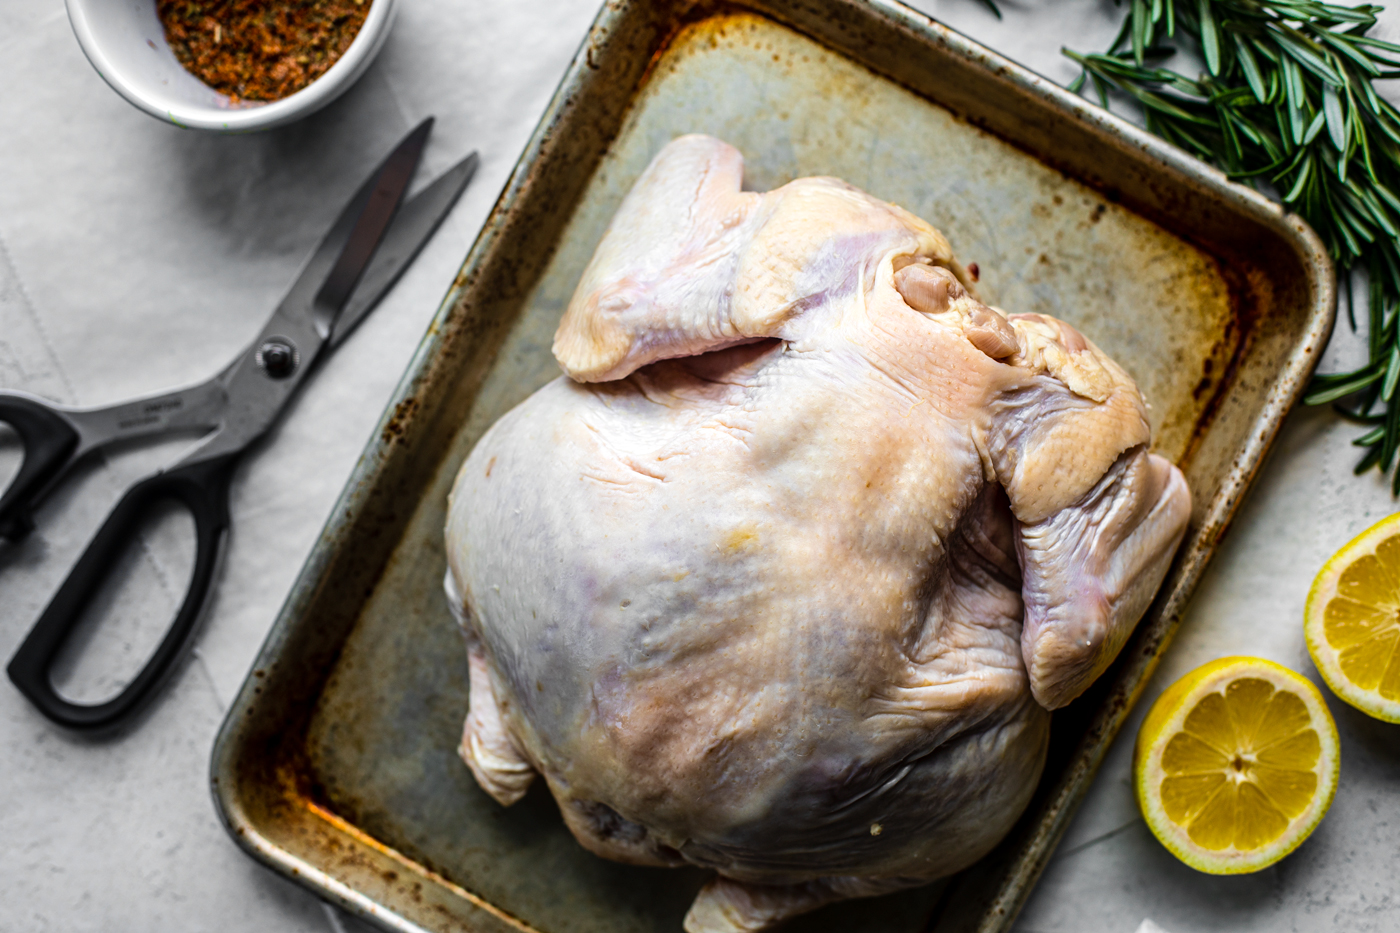
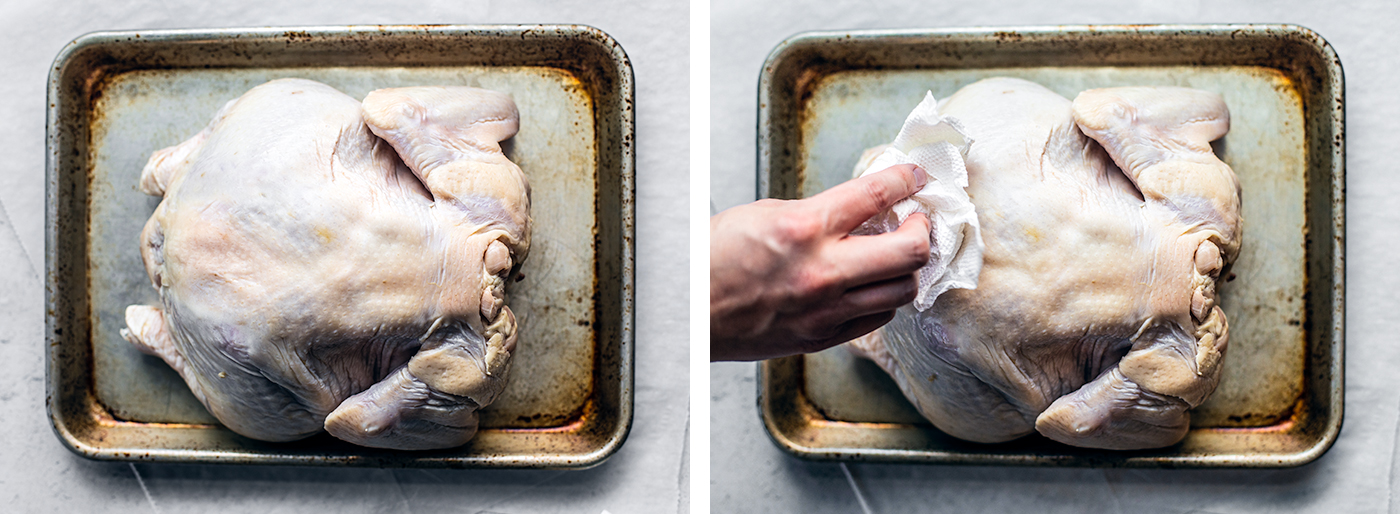
Step 1: Pat the Chicken Dry
Place the chicken on a baking sheet, breast-side down, and pat it with paper towels to absorb excess moisture for a nice, crisp skin.
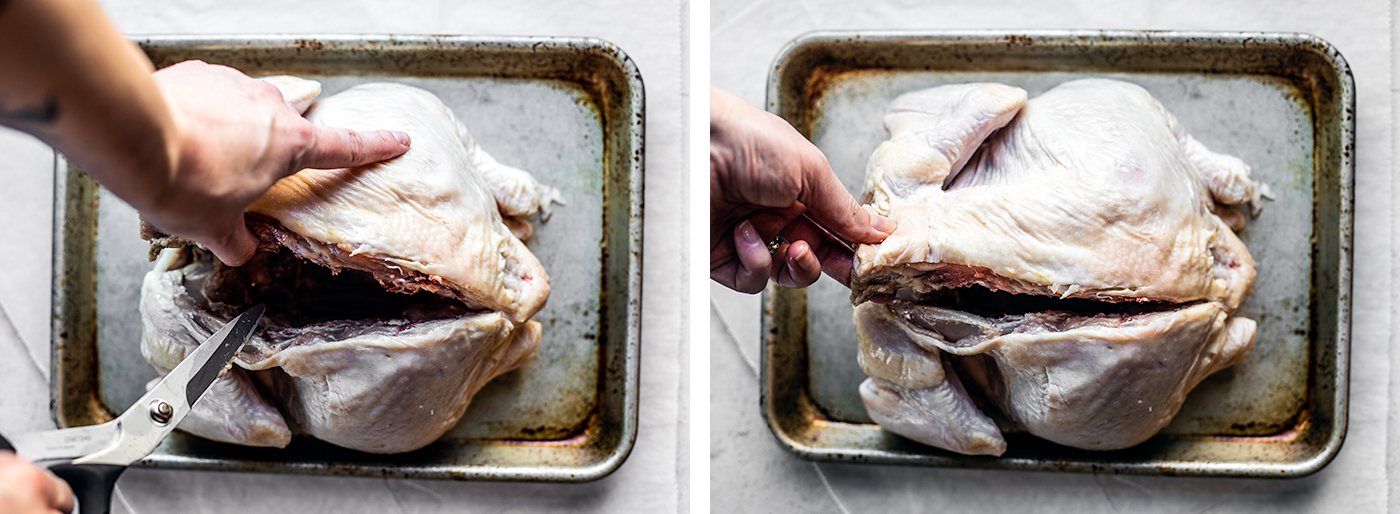
Step 2: Remove the Backbone
Place the chicken breast-side down on a cutting board or baking sheet. Cut along both sides of the backbone with kitchen shears and remove it completely.
Tip: Pack and freeze the backbone for future chicken stock.
Step 3: Flip and Flatten
Turn the chicken over so it’s breast-side up. Press firmly down on the center of the breast until it flattens, and you hear a slight crack.
Spread the chicken’s legs apart and flip them over so they are facing outward, skin-side up.
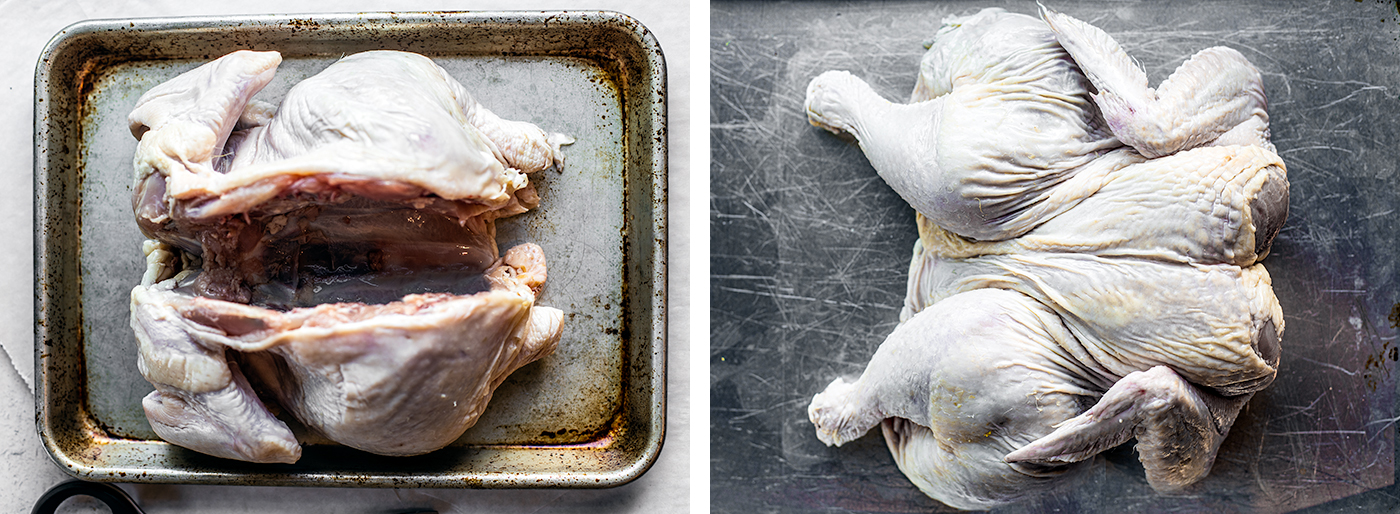
Congratulations! You’ve spatchcocked a chicken like a pro. Now the rest comes together quickly; at this point, your chicken is ready to be seasoned and cooked.
How to Cook Spatchcocked Chicken
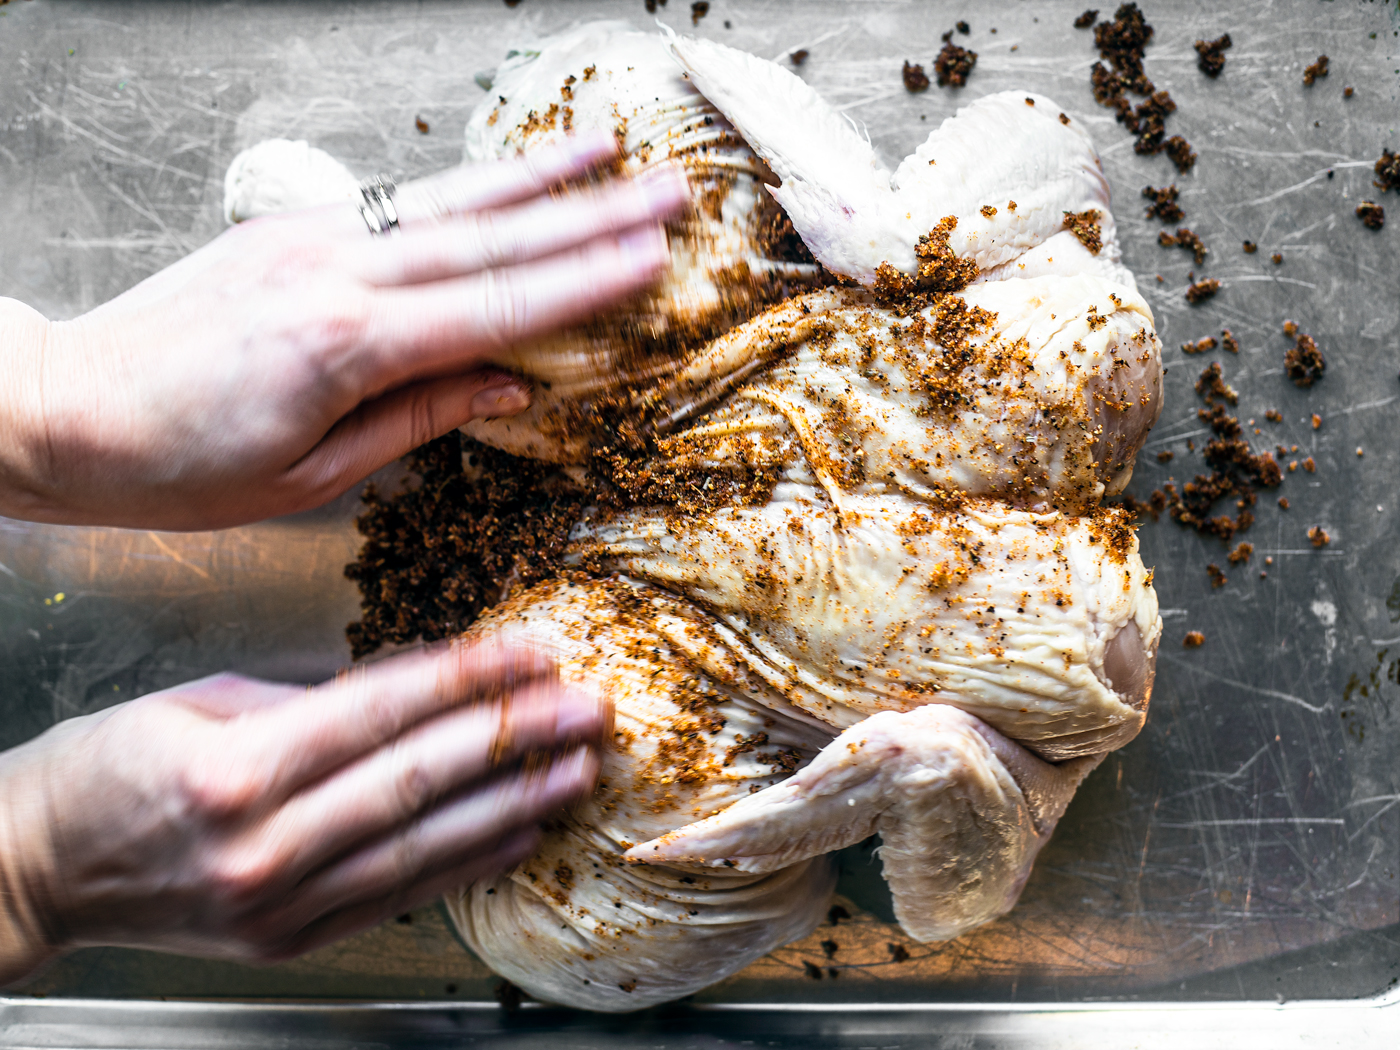
Step 1: Prep and Season
Mix the dry rub ingredients together in a small bowl.
Lift and separate the skin so you can get your fingers underneath it. Rub a generous amount of oil over the chicken skin and under it, and season it generously with the dry rub.
Step 2: Temper the Chicken
Let the chicken sit at room temperature for 30 to 60 minutes before roasting. This ensures the bird cooks evenly and ends up with crispy skin.
Step 3: Preheat the Oven
About 20-30 minutes before cook time, preheat your oven to 475°F. Transfer the chicken to a large baking sheet.
Step 4: Prepare the Veggies (If you’re just cooking a chicken, skip this step and move on to Step 5)
Trim the Brussels sprouts and give rinse under cool water. Set them on paper towels to air-dry for at least 15 minutes, dabbing them with paper towels to remove excess moisture. You want them to be really dry to get crispy in the oven.
Rinse the baby potatoes under cold water, dry them, then cut them in half.
Transfer the Brussels sprouts and potatoes to a large mixing bowl, drizzle with olive oil, and season them with sea salt and pepper. Toss well to coat; don’t add them to the baking sheet yet.
Step 5: Roast the Chicken
Roast the chicken on its own in the oven for 20 minutes (or for 40-50 minutes undisturbed if you’re not adding the veggies).
Step 6: Roast the Veggies
Remove the baking sheet from the oven and transfer the veggies to the pan, spreading them out so they aren’t overcrowded. Place the lemon halves on the pan face down, along with fresh herbs and garlic cloves for aromatics, if using.
Transfer to the oven and roast for 30-35 minutes, or until the chicken registers 160-165ºF on a meat thermometer.
Tip: The best spot to check is the thickest part of the inner thigh, close to the breast, away from the bone.
Step 7: Rest Before Serving
Take the chicken out of the oven and sprinkle Parmesan over the vegetables, then let the chicken rest for 10 minutes before carving. This helps the juices redistribute, keeping the meat tender and juicy.
Before serving, squeeze the warm lemons over the chicken.
Substitutions & Variations
- Butter: Mix 1/4 cup of softened butter with the dry rub seasoning, then rub the mixture all over the chicken, including under the skin, before roasting.
- Sweet potatoes: Cut them into uniform 1/2 to 1-inch cubes.
- Vegetables: If Brussels sprouts aren’t your thing, you could use carrots, parsnips, turnips, or butternut squash. Be sure all are cut into uniform 1-inch cubes so they roast at the same rate.
Storage & Reheating
- Reheat: Heat the chicken and vegetables in the microwave in 25-second increments until warmed through.
- Fridge: Store the chicken and vegetables separately in airtight containers for up to 4 days.
- Freezer: Let the chicken cool completely, then portion and wrap the pieces of meat (thighs, breasts) individually in plastic wrap, then aluminum foil. Then place them in a freezer-friendly container for up to 3 months. Thaw in the fridge overnight, then reheat.
What to Serve With Spatchcocked Chicken
If you want to skip roasting veggies on the same pan, I’ve got some great options that don’t require the oven:
Frequently Asked Questions
Spatchcocked chicken cooks fast—about 40 to 55 minutes at a temperature between 425 and 475°F. Lying flat means no thick, uneven parts holding everything up. You’re done when the skin is deeply golden and crispy, and your thermometer reads 160°F in the thickest part of the breast. Don’t guess, just check.
A spatchcock chicken (sometimes called butterflied, same thing) is a whole bird with the backbone cut out so it lies completely flat. You cut it with kitchen shears, it takes about a minute, and it’s probably the single most useful thing you can do to a whole chicken. It cooks in roughly half the time, the skin gets properly crispy all over, and you can season every inch of it without any awkward maneuvering.
Spatchcocking means removing the backbone so the bird lies completely flat. The point is that everything cooks at the same time: no more dry, overcooked breast while you wait for the legs to catch up. You also get more crispy skin (all of it, not just the top), and it’s much easier to season and carve. It’s a small amount of effort that fixes basically every problem people have with roasting a whole chicken.

Easy Roasted Spatchcocked Chicken (With Video)
Ingredients
For the chicken
- 1 whole chicken, about 5 lbs, Gizzards removed if necessary
- 1 TBSP sea salt
- 1 tsp cracked black pepper
- 1 tsp garlic powder
- 1 tsp onion powder
- 1 tsp smoked paprika
- 1 tsp Italian seasoning
- 1 lemon, zested; keep the lemon for roasting
- 1-2 TBSPS olive oil
For the vegetables
- 1 lb Brussels sprouts, ends trimmed and cut in half
- 1.5 lb baby potatoes, cut in half, I like to use baby honey gold potatoes
- 1-2 TBSPS olive oil
- 2 tsp sea salt
- 1 tsp cracked black pepper
- 1 cup grated parmesan cheese
Instructions
To spatchcock the chicken:
- Transfer the chicken, breast-side down, onto a large baking sheet. Gently pat the entire chicken with paper towels to absorb excess moisture.
- Cut along both sides of the backbone with kitchen shears and remove it completely.
- Flip the chicken over so it’s breast-side up, and press down firmly on the center of the breast until it flattens. You'll hear a crack. Then spread the chicken's legs apart and flip them over so they are skin-side up and facing outward.
Making spatchcocked chicken:
- In a small bowl, mix the dry rub ingredients together with the zest of the lemon.1 TBSP sea salt, 1 tsp cracked black pepper, 1 tsp garlic powder, 1 tsp onion powder, 1 tsp smoked paprika, 1 tsp Italian seasoning
- Lift the skin up so you can get your fingers underneath it, and rub a generous amount of oil over the chicken skin and under it, then season it generously with the dry rub.
- Let the chicken sit at room temperature for at least 30 minutes, or up to 60 minutes, before roasting so the bird cooks evenly and has crispy skin.
- Preheat the oven to 475°F about 20-30 minutes before cook time.
- Trim the Brussels sprouts and give rinse under cool water. Set them on paper towels to air-dry for at least 15 minutes, dabbing them with paper towels to remove excess moisture. You want them to be really dry to get crispy in the oven.
- Rinse the baby potatoes under cold water, dry them, then cut them in half.
- Transfer the dried Brussels sprouts and potatoes to a large mixing bowl, drizzle with olive oil, and season them with sea salt and pepper. Toss to coat and set aside.
- Roast the chicken alone for 20 minutes (or for 40-50 minutes undisturbed if you’re not adding the veggies).
- Remove the chicken from the oven and dump the veggies onto the pan, spreading them out so they aren’t overcrowded. Put the lemon halves on the pan face down. Optional: add fresh herbs and garlic cloves for aromatics.
- Place the baking sheet back into the oven for 30-35 minutes, or until the chicken registers 160-165ºF on a meat thermometer.
- Remove from the oven and sprinkle Parmesan over the vegetables.
- Let the chicken rest for 10 minutes before carving. This helps the juices redistribute, keeping the meat tender and juicy. Before serving, squeeze the warm lemons over the chicken.


this is everything I love in a dinner! obsessed with lemon atm and I also just bought some Shun kitchen shears for spatchcocking purposes!
Awesome! I’m adding lemon to everything these days, too. Perfect splash of brightness!
I made this chicken for dinner last night and it was incredible! Thanks so much for sharing the recipe!
You’re very welcome!
I love this chicken recipe. That is a good idea for holiday main dish.
Glad you love it, Shadi!
So easy to make and delicious to eat. This is fancy enough for the holidays as well as a weeknight dinner for the family.
Oh, totally! It really does present beautifully.
The herbs and spices added so much flavor to this chicken! It came out perfectly moist and juicy~
Love to hear it!
Your Lemon Spatchcock Chicken is gonna be a hit in my house on Sundays! Thanks for sharing!
You’re so welcome!
I’ve made this chicken twice and it turned out perfectly both times! So juicy and full of flavor!
Awesome to hear, Tayler!
So flavorful! I love the easy to follow guide, too. This recipe is one of my favorites!
I’m so glad, Tara!
I LOVE that this whole meal cooks on one sheet-pan. The flavors are amazing! Also, spatchcocking the chicken was easier than I thought it would be.
Right? The technique seems so intimidating at first blush but once you do it, you feel like a rockstar ;)
This whole post is so helpful! I really appreciate how simple and straightforward the seasonings are here – they pack a ton of flavor without feeling like one more overwhelming thing, so I could really concentrate on this new-to-me technique. Will add this one to the rotation for sure!
I’m so glad it was helpful, Jessie. I was incredibly anxious when trying this technique for the first time also, so I wanted to make it seem as approachable as possible. Because really, it’s super easy!